
This page explains the complete Pi Network KYC verification process. Follow each step carefully to complete your KYC successfully.
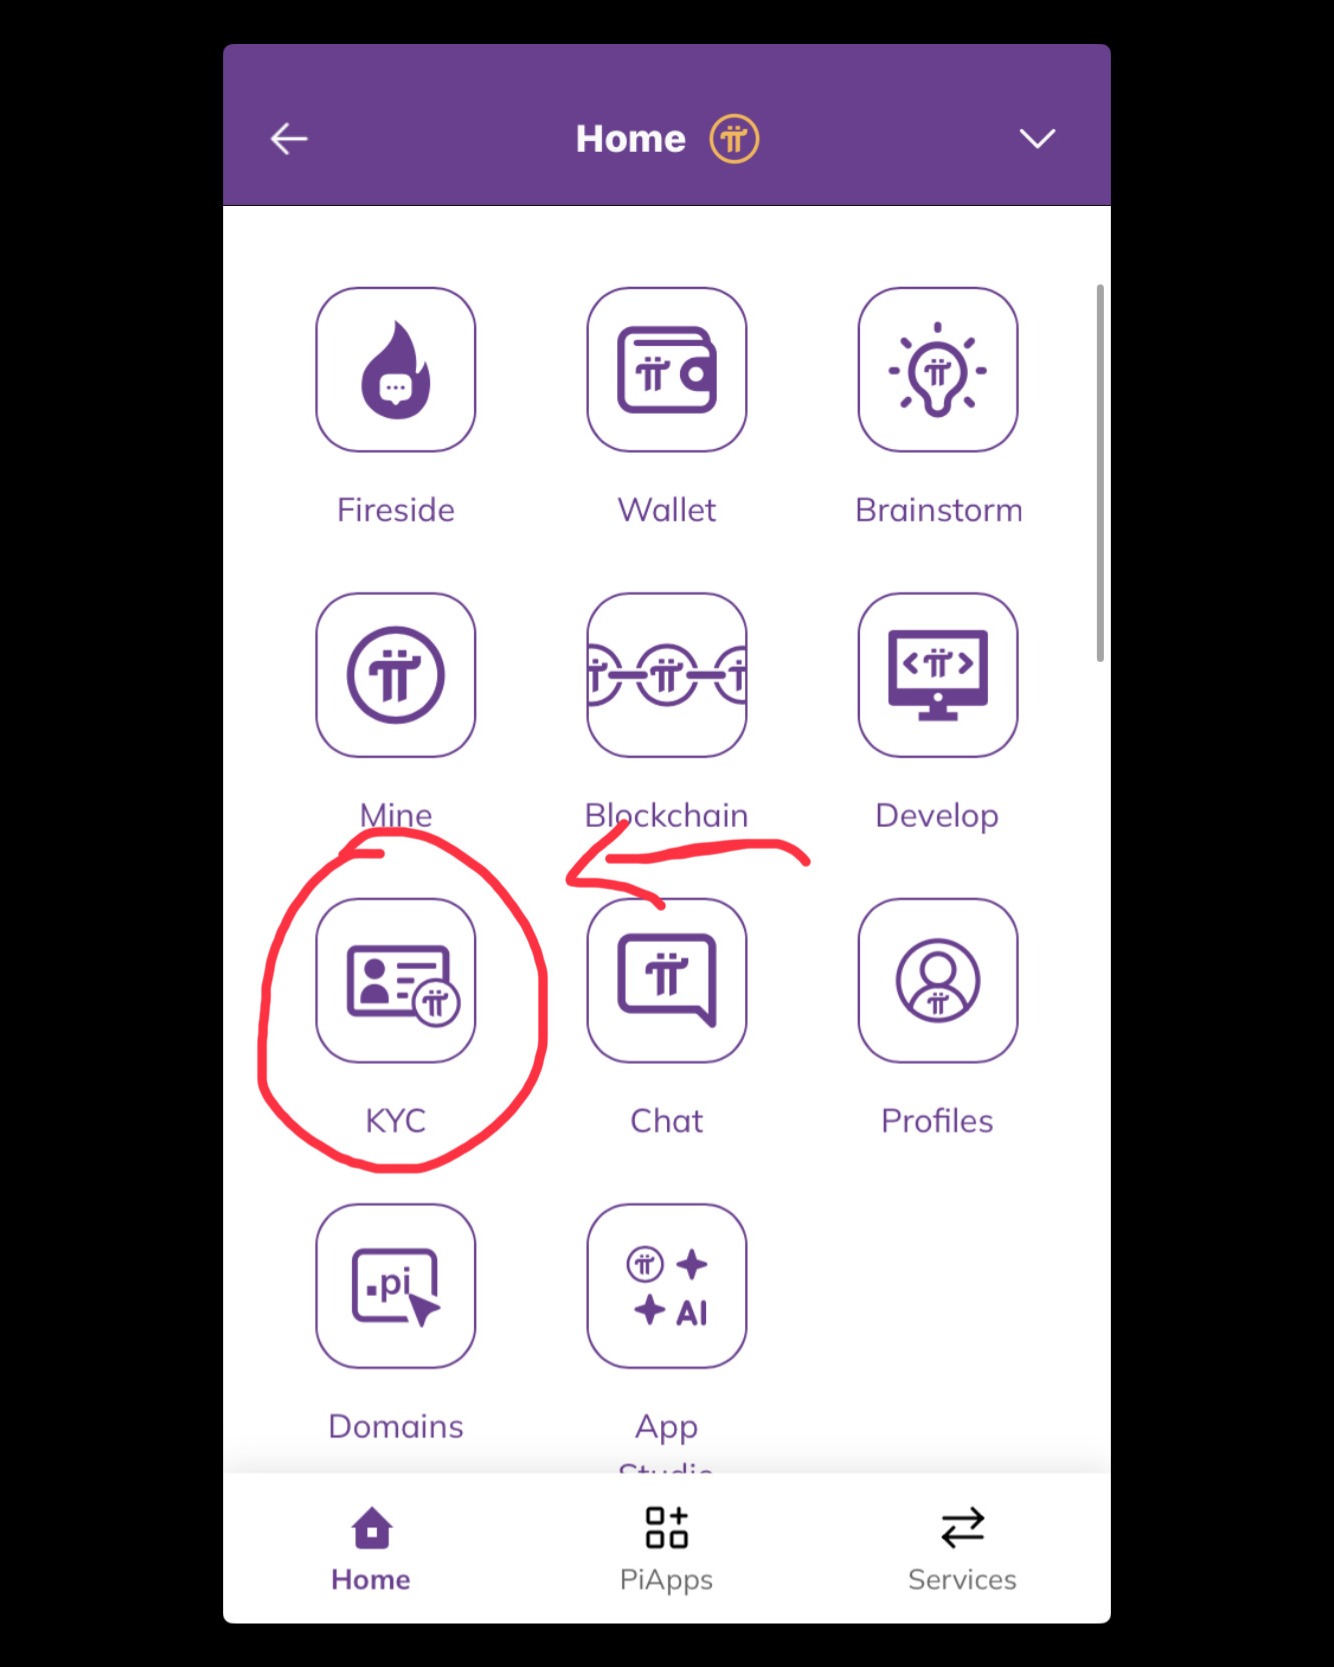
Step 1: Open Pi Browser and Click on KYC
Open the Pi Browser app from your Pi Network application. Inside Pi Browser, locate and click on the KYC option to start the identity verification process.
Step 2: KYC Eligibility Status
If you are eligible for KYC, you will see a message saying “Congratulations! You have been selected for ID verification.” This means you can continue with the KYC process.
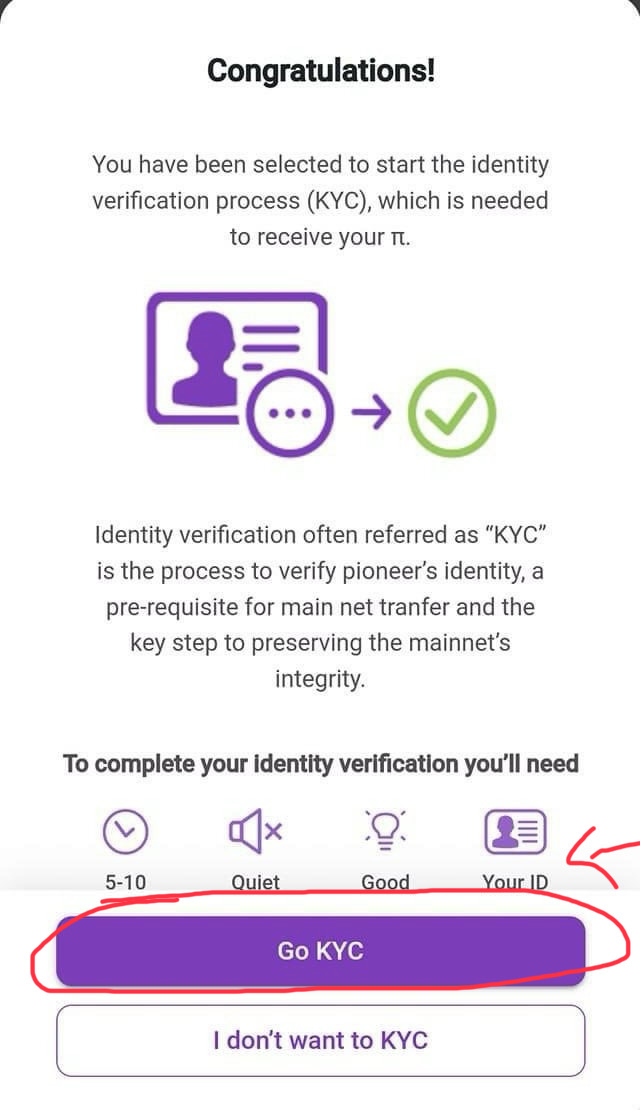
If you do not see this message, do not worry. You need to wait until you complete at least 15 mining sessions and remain active. KYC slots are released gradually.
Step 3: Submit ID and Complete Face Verification
Choose a valid government-issued ID according to your country, such as a passport, national ID card, or driving license. Follow the on-screen instructions to upload your ID and complete face verification.
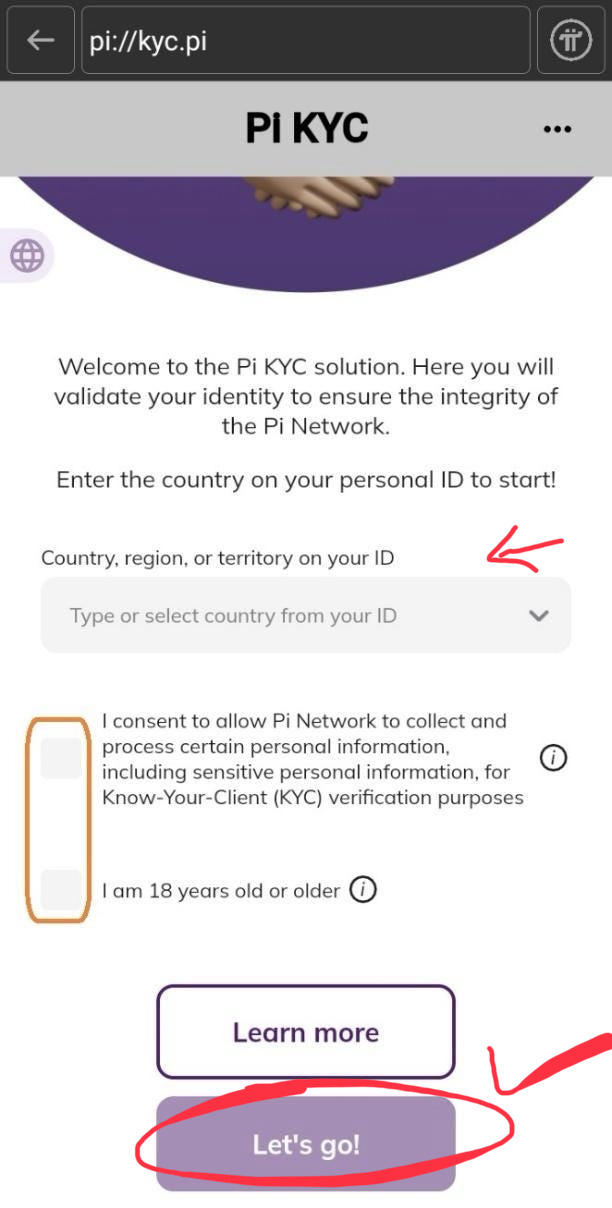
Make sure the name and date of birth on your ID exactly match your Pi Network profile details. Any mismatch may cause KYC rejection.
⚠️ Disclaimer:
This website is not affiliated with, endorsed by, or officially connected to Pi Network or the Pi Network Core Team.
All information provided on this page is for educational and informational purposes only. KYC eligibility, approval, and verification are fully controlled by Pi Network.
Users should always follow official Pi Network announcements, rules, and guidelines. We do not collect personal data and do not promote or support illegal activities.
📧 Contact / Feedback Email:
picoin@pinetworksell.com