
This page explains the complete Pi Mainnet migration process. Follow all 9 steps carefully to successfully move your Pi coins to Mainnet.
- STEP : 1 – Download Pi Browser App
Install the official Pi Browser to access Mainnet tools.

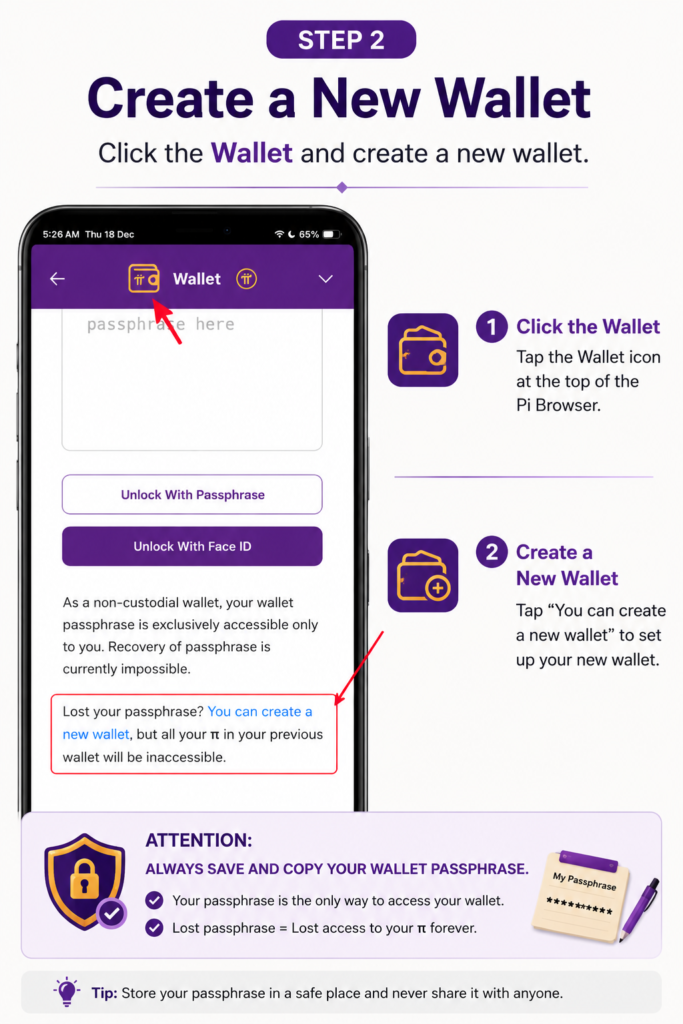
- STEP : 2 – Create a Pi Wallet
Generate your Pi Wallet securely inside the Pi Browser.
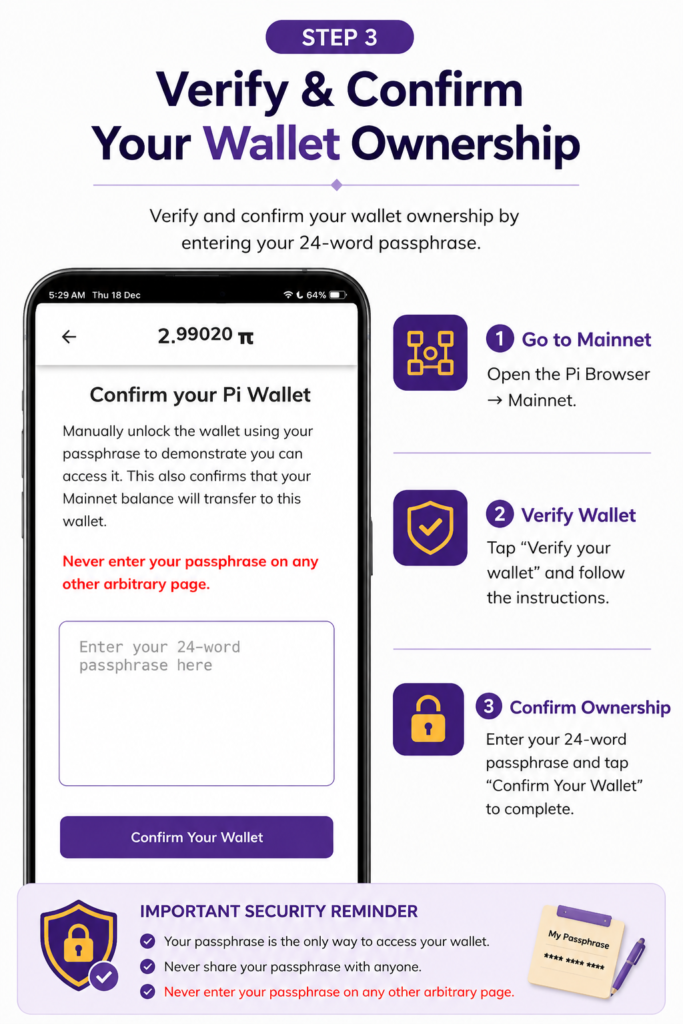
- STEP : 3 – Confirm Your Pi Wallet
Verify and confirm your wallet ownership.
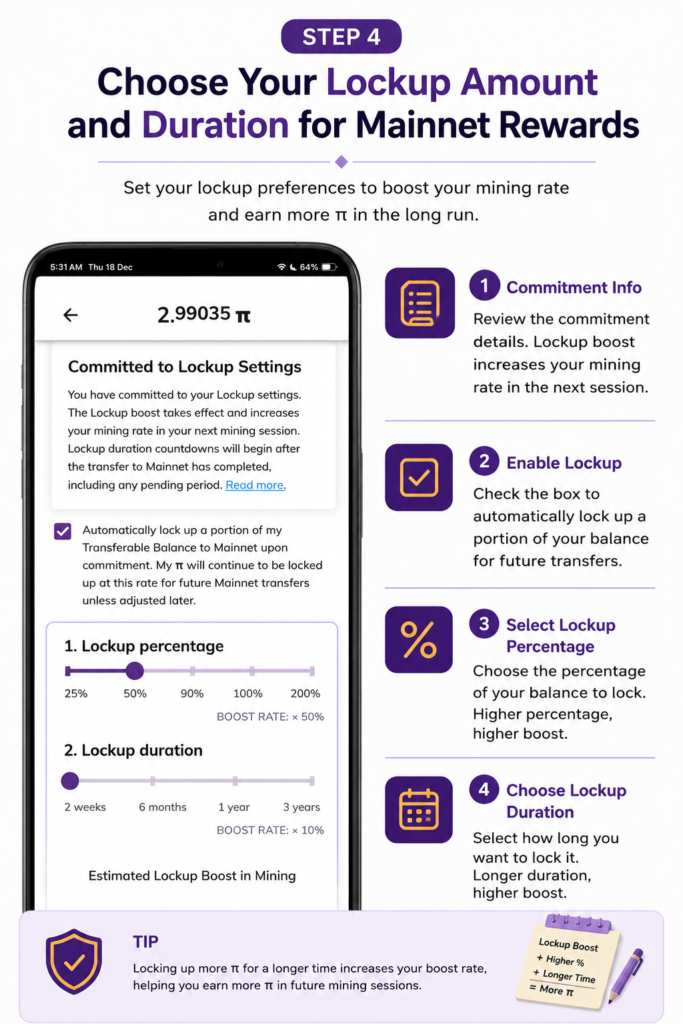
- STEP : 4 – Commit Lockup Configuration
Choose your lockup amount and duration for Mainnet rewards.
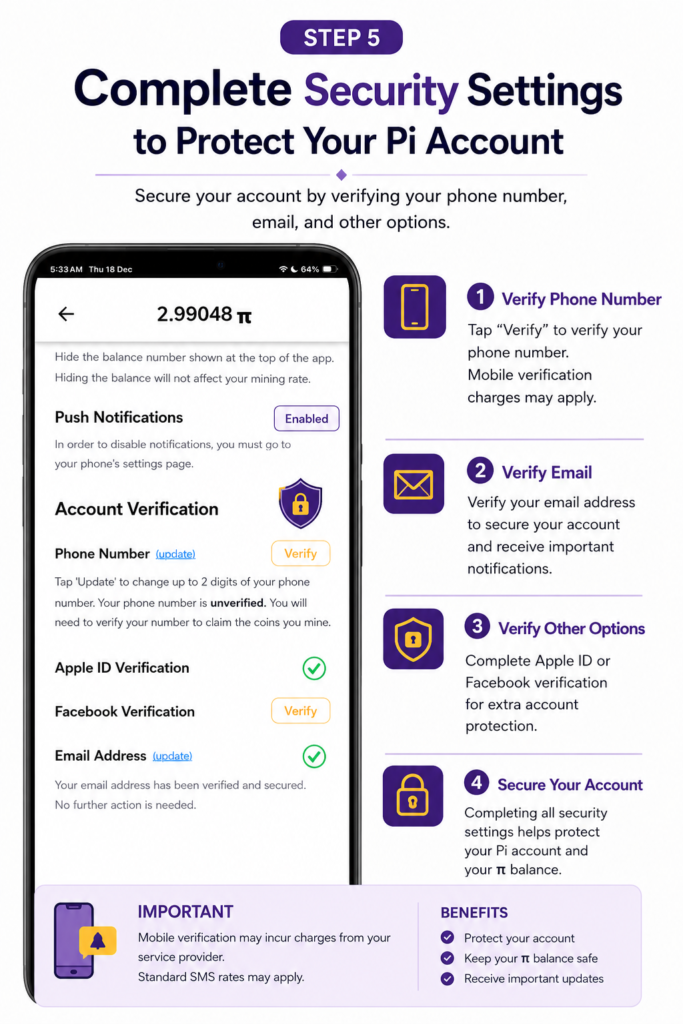
- STEP : 5 – Secure Your Pi Account
Complete security settings to protect your Pi account.
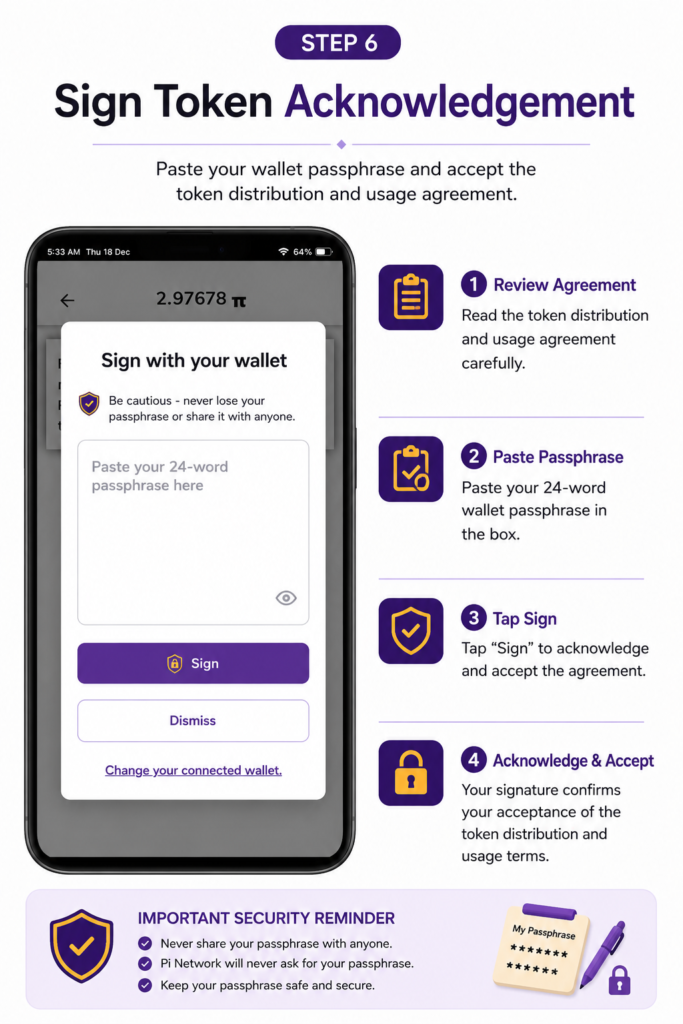
- STEP : 6 – Sign Token Acknowledgement
Accept the token distribution and usage agreement.
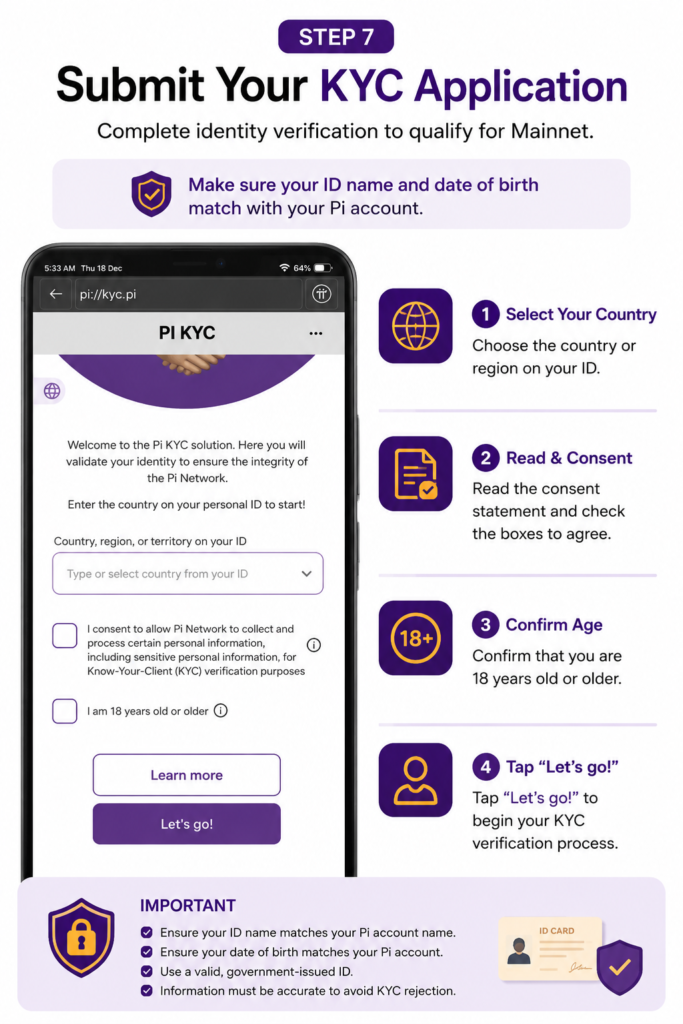
- STEP : 7 – Submit Your KYC Application
Complete identity verification to qualify for Mainnet.
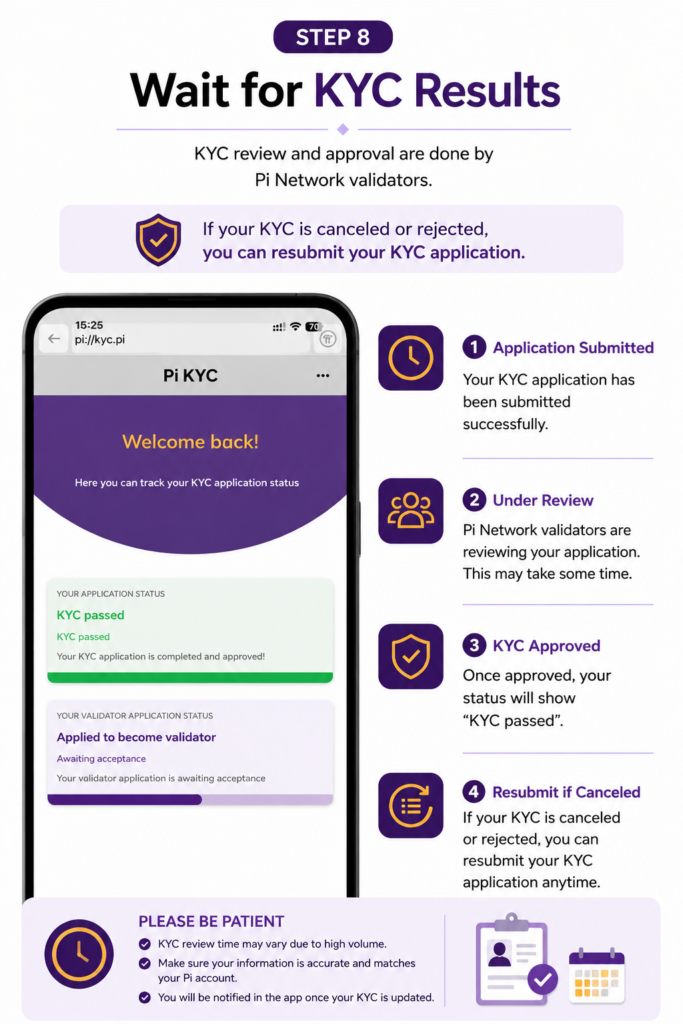
- STEP : 8 – Wait for KYC Results
KYC review and approval by Pi Network validators.
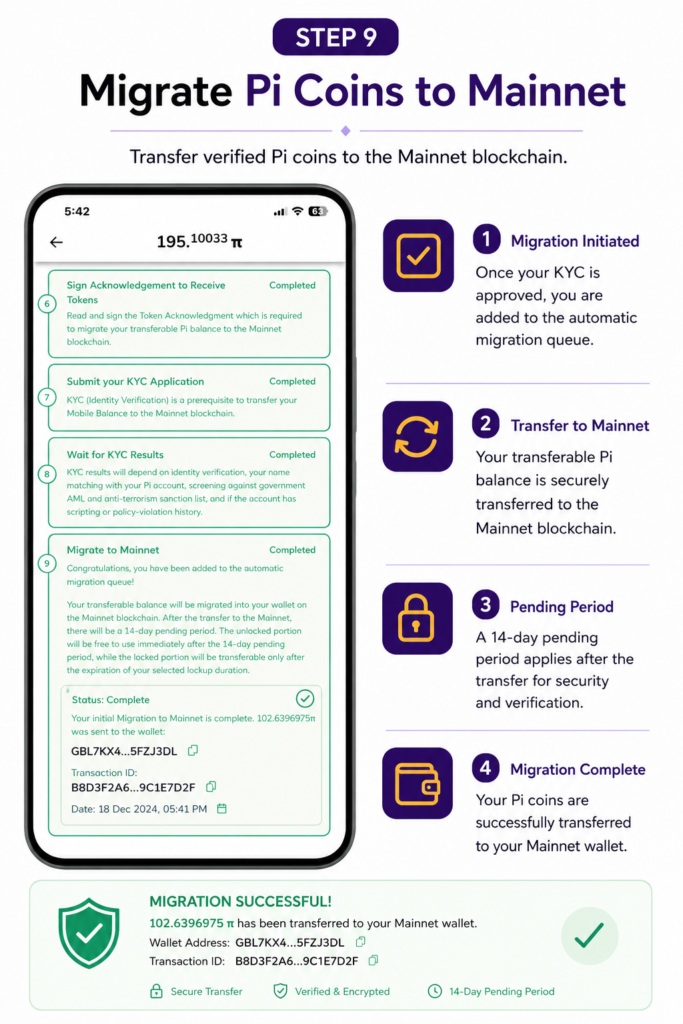
- STEP : 9 – Migrate Pi Coins to Mainnet
Transfer verified Pi coins to the Mainnet blockchain.
Last Updated: January 2026
⚠️ Disclaimer:
This website is not affiliated with, endorsed by, or connected to Pi Network or its core team. This guide is for educational purposes only. Pi Network rules, KYC availability, and Mainnet migration steps may change at any time. Always follow official Pi Network announcements.